-
Responding to recruiter emails with GPT-3
If you’re just interested in the code, here it is.
Like many software engineers, each week I receive multiple emails from recruiters.
I’m grateful to work in a field with such opportunities, and I know that receiving a lot offers to interview is a good problem to have. But, practically, most of the time I’m not looking for a new job, and so handling all these emails is a recurring administrative task.
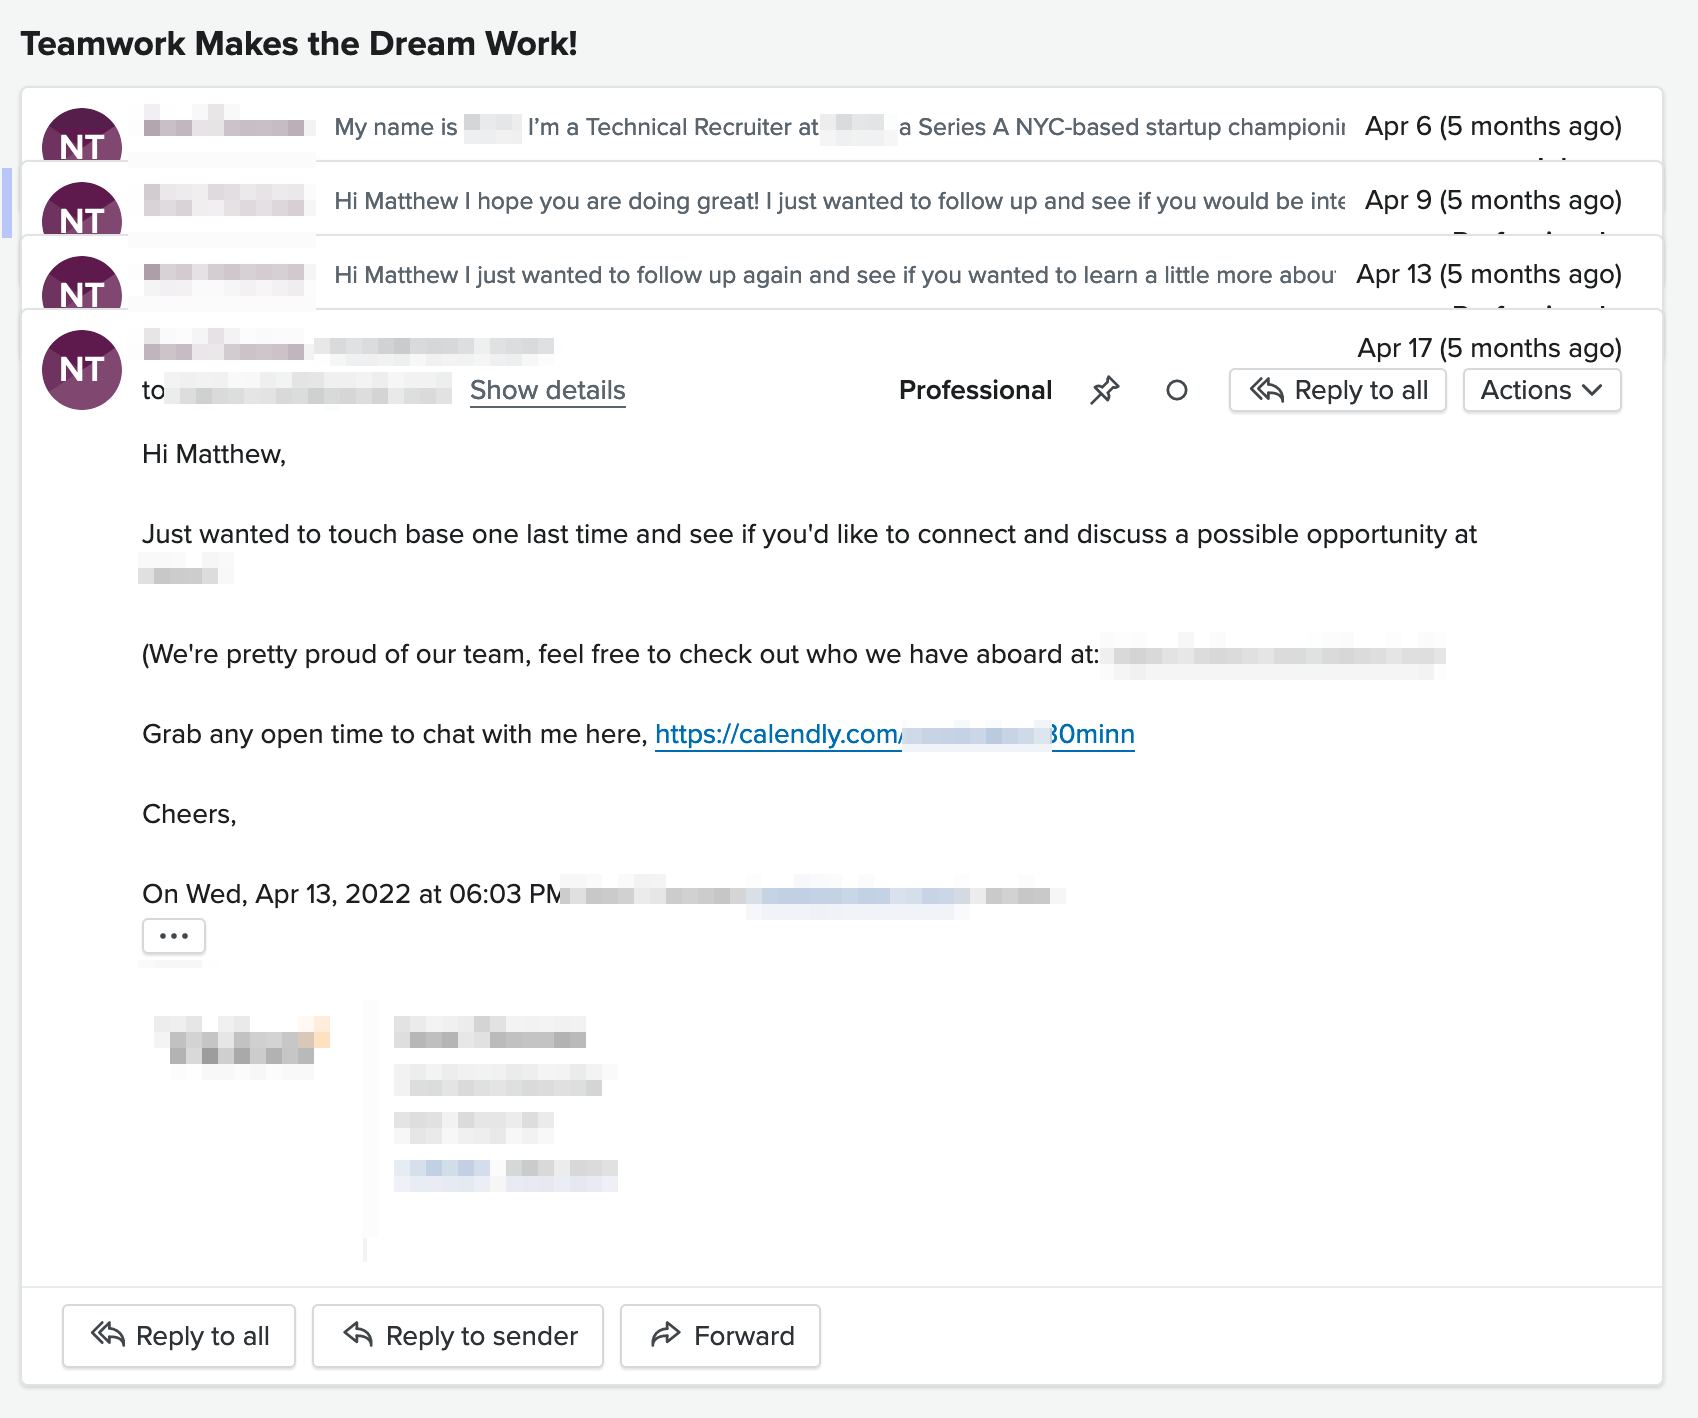
Here’s an example thread that I neglected to respond to:
I do try to respond to all recruiter emails with a short message that pretty much always follows a format like:
Hi <recruiter name>,
Thanks for reaching out! I’m not interested at this time, but I’ll keep <your company> in mind.
- Matt
There are a few reasons that I respond to these emails (rather than merely ignore them):
- It’s polite
- If I don’t respond, the recruiter will often send multiple follow-up emails
- Maintaining a cordial relationship with the recruiters is in my best interest for future job searches
I use some rough email filtering rules to funnel recruiter emails to an email folder. Then, when I have time, I go through the list of unreads and send my little response.
It would be ideal if I could automate sending these responses. Assuming I get four such emails per week and that it takes two minutes to read and respond to each one, automating this would save me about seven hours of administrative work per year.
A trivial approach would be to send a canned response. But a touch of personalization would aid in my goal of maintaining a good relationship with the recruiter.
Extracting the name of the recruiter and their company from the email using a rule-based approach / trying to parse the text would be really tricky and error prone. Luckily, OpenAI’s GPT-3 language model is quite good at processing this email.
Using the GPT-3 API, we can provide the recruiter’s email along with an example, and extract the required information. It can even format the output as JSON.
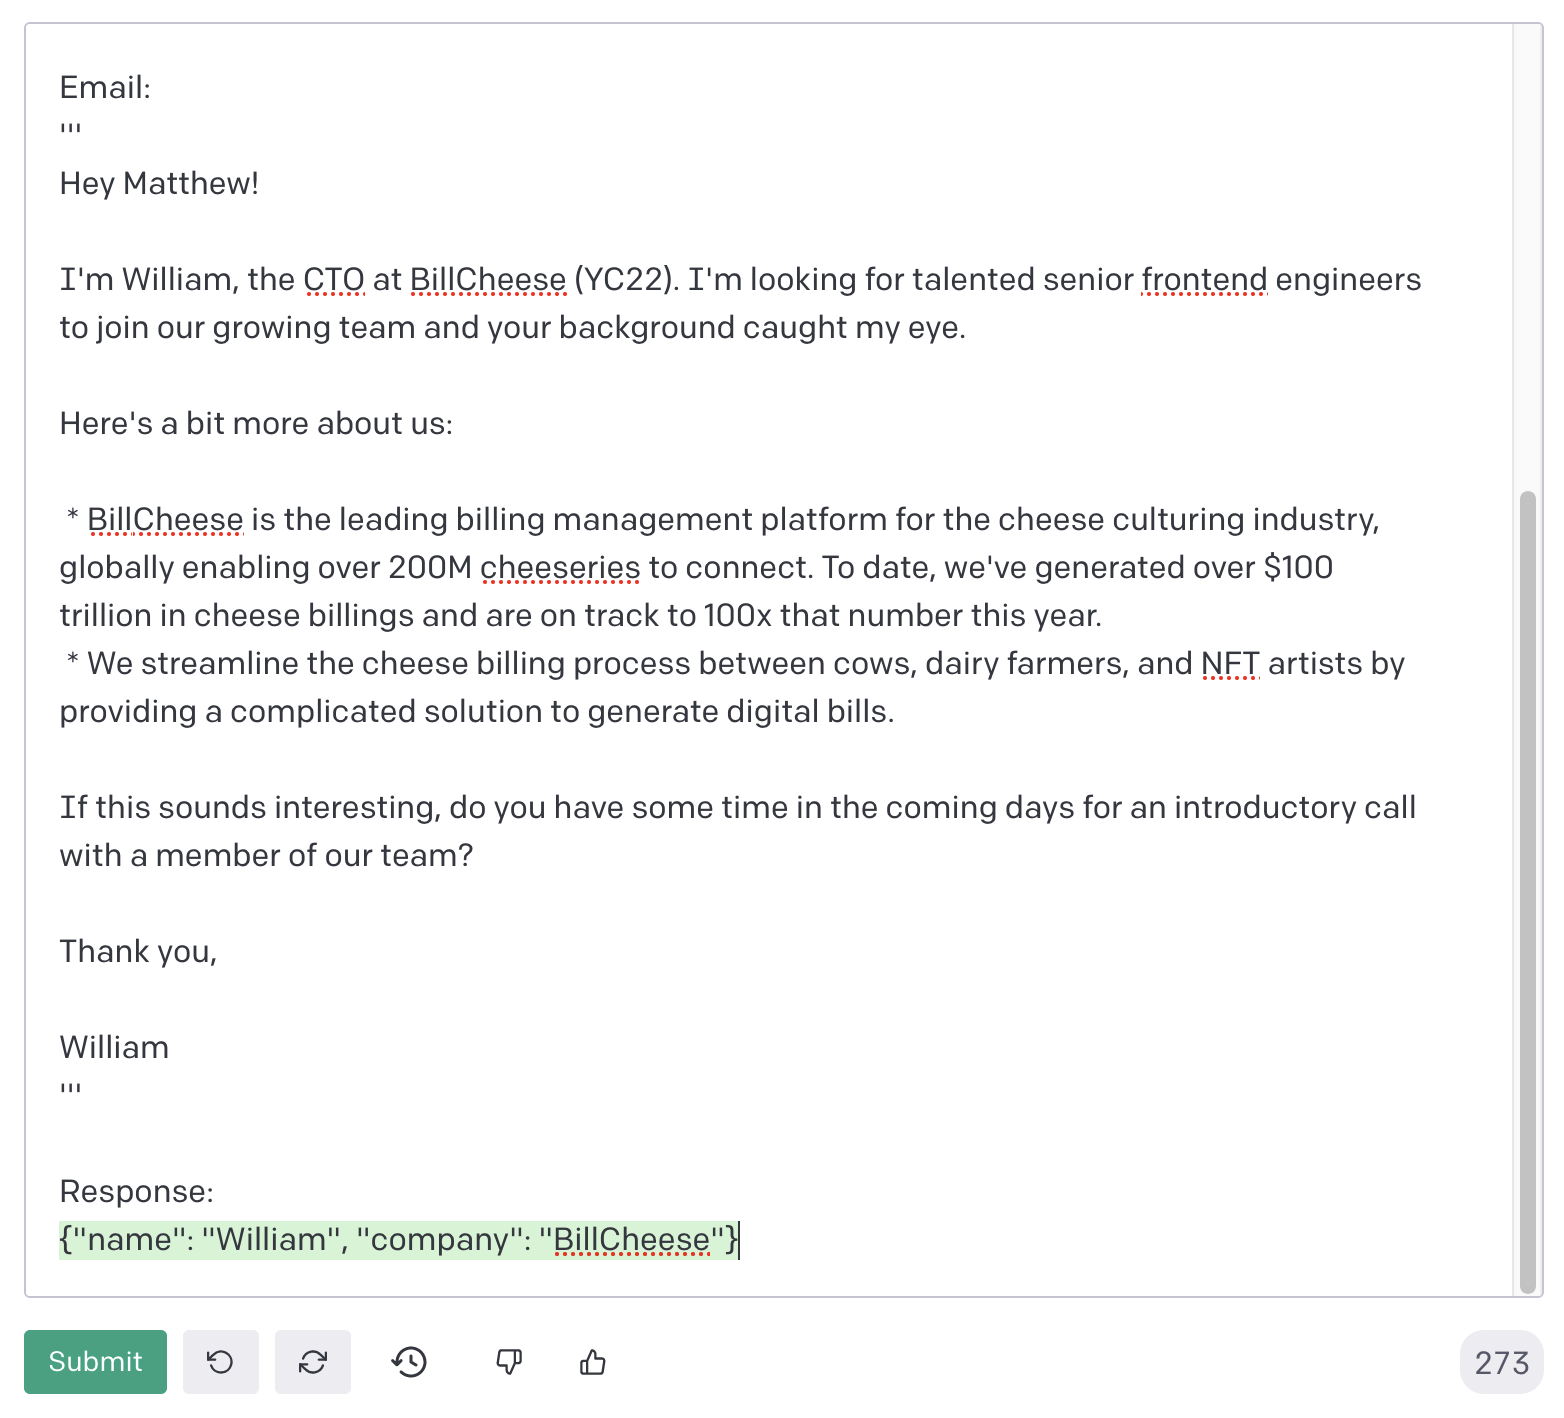
    def get_recruiter_name_and_company(email_text: str):
        """Uses OpenAI text models to automatically parse the recruiter's name
        and company from their email."""

        prompt = f"""
        Given an email from a recruiter, return the recruiter's first name and the recruiter's company's name formatted as valid JSON.

        Example: ***
        Email:
        '''
        Hi Matt! This is Steve Jobs with Apple Computer Company! I'm interested in having you join our team here.
        '''

        Response:
        {{"name": "Steve", "company": "Apple Computer Company"}}
        ***

        Email:
        '''
        {email_text}
        '''

        Response:
        """

        # don't make expensive OpenAI API calls unless operating in production
        if not IS_PROD:
            return json.loads('{"name": "Steve", "company": "Apple Computer Company"}')

        completion = openai.Completion.create(
            model="text-davinci-002",
            prompt=textwrap.dedent(prompt),
            max_tokens=20,
            temperature=0,
        )

        return json.loads(completion.choices[0].text)
Here’s an example from the OpenAI Playground.
With the recruiter’s name and company in hand, responding is just a matter of interpolating those variables into the body of my standard response template:
response = f"""\
Hi {recruiter_name or ""},
Thanks for reaching out! I'm not interested in new opportunities at this time, but I'll keep {recruiter_company or "your company"} in mind for the future.
Thanks again,
{SIGNATURE}
"""
IMAP and SMTP are used to interface with the mailbox. The rest of the code can be found in this repo.
This solution worked well for the handful of emails I tried it on. I’m planning to run this on a cron to save myself some time and automatically maintain recruiter relationships.
-
Casting YouTube to Chromecast on Macos (with VLC)
I have a Chromecast. I use Firefox. The only extension for casting content from Firefox that I found is fx_cast, but I wasn’t able to get it to work properly :(
This post describes a solution I hacked together to cast video without Chrome (and without an Android emulator). It relies on VLC to do the actual casting. VLC is capable of (a) opening video from a network stream, and (b) using a Chromecast as the video renderer.
The script just copies the URL of the current Firefox tab and then invokes the VLC command line interface, passing in the video URL. I invoke the script with Alfred when FF is browsing to a YouTube video (haven’t tested with other streams).
use scripting additions use framework "Foundation" on get_url_ff() tell application "Firefox" to activate set thePasteboard to current application's NSPasteboard's generalPasteboard() set theCount to thePasteboard's changeCount() tell application "System Events" keystroke "l" using {command down} delay 0.2 keystroke "c" using {command down} end tell -- hacky heuristic to help ensure the URL is copied repeat 20 times if thePasteboard's changeCount() is not theCount then exit repeat delay 0.1 end repeat set the_url to the clipboard return the_url as text end get_url_ff on chromecast_tab_ff() set the_url to get_url_ff() -- how to get chromecast IP https://old.reddit.com/r/Chromecast/comments/8nu0d7/how_to_find_chromecasts_ip/dzyenff/ do shell script "/Applications/VLC.app/Contents/MacOS/VLC " & quoted form of the_url & " --sout \"#chromecast\" --sout-chromecast-ip=192.168.0.198 --demux-filter=demux_chromecast" end chromecast_tab_ff chromecast_tab_ff() -
OMSCS Retrospective
At the end of 2021, I finished earning my master’s degree in computer science through Georgia Tech’s OMSCS program. This post is a look back on that experience. Previously, I wrote about my motivation for enrolling in OMSCS.
In terms of time, it took me 4.5 years to complete the program. I was working full time during this period, so I only took one course per semeseter (except for Fall 2020 when I doubled up). I also didn’t take any classes during the summer semesters. Fitting school around my work schedule was doable. My normal routine was school work three weeknights and one weekend day. I probably averaged ~10 hours per week on coursework and studying, though the workload varied depending on the class. I was able to earn a 4.0, and I never felt like I was doing an unreasonable amount of work. The course workloads aggregated on OMSCentral seem relatively accurate, but personally I think I spent less time than what’s listed there.
The program did sometimes put a strain on my social life, but from spring 2020 onward we were under COVID-19 restrictions anyway. It was often a drag to finish an entire day of work, only to then have to study for a test or implement a programming assignment. I know people complete their degree while caring for dependents, and it’s hard to imagine how they make it work. Now that I’m done, I’m glad to have some more free time back in my life.
In direct financial terms, the entire degree costed almost $8k, some of which was covered by my employer. Whether the degree has paid (or will pay) for itself is unclear. I’m not intending, in my next job search, to target only jobs for which an M.S. is required. I believe I’m a stronger engineer for having completed the program, but any future success in my career probably won’t be directly attributable. My OMSCS specialization was Machine Learning, but I don’t intend to pivot my career to an ML focus. “Artificial Intelligence” has an aura of extreme hype, and I think my ML specialization has helped me to regard AI with a more informed and critical perspective.
I think the experience served the goals I’d set for it. Namely, it gave me a structured way to learn more about sub-fields of CS that I wasn’t normally exposed to in my daily work as a web software engineer. Probably most importantly, it strengthened my learning ability, which is of course hugely applicable. Fighting impostor syndrome is an ongoing battle, but I think being able to understand the course material also helped in that regard.
My advice to OMSCSers…
- Create a schedule and stick to it. I didn’t start doing this until about halfway through – till then I didn’t have a clear boundary between personal time and “school” time, and so I was under a constant low level stress that I should be doing school work.
- Watch all the lecture material. If you don’t understand something, rewatch it.
- Do all the homework and follow the schedule prescribed by each course.
- Attend office hours or watch recordings afterward. There is a lot of elucidating conversation there, and TAs will often go into depth on issues that are immediately relevant to exams and homework.
- Participate in Piazza and unofficial channels like Slack. Interacting with other students helps solidify understanding and it’s one of the benefits of a program like OMSCS over self-study.
- As in all of life, don’t be afraid to ask questions.
The rest of this post is a list of the courses I took and some brief notes about each one…
Fall 2017: Intro to High-Performance Computing
I took this course first because it was supposedly really challenging and really good. I wanted to see what I was getting myself into. It was indeed pretty hard! The programming assignments were in C and C++, with which I was rusty. I’d also been out of college for five years. The course material was about distributing massive workloads on supercomputers using tools like MPI. The recorded lectures were engaging and entertaining and the lab assignments were nontrivial. In retrospect, it was a rewarding and fun class despite being challenging. I’m glad I took it first. I probably spent the most time on this course.
Spring 2018: Machine Learning for Trading
This class was a broad introduction to statistical methods like regression, Q-Learning, and KNN, and to financial concepts like market mechanics, valuing companies, and technical analysis. The course was much easier than HPC. The lectures were entertaining. It turned out to be a good primer for other concepts that are covered throughout the Machine Learning specialization, and I’m glad I took it before ML. And practically, it was a nice introduction to working with standard Python tools like NumPy, Pandas, etc. This course was also where I first learned about options.
Fall 2018: Computer Vision
This class covered a lot of material, including: linear image processing, Hough transforms, feature detection, optical flow, camera calibration, and tracking. I was surprised how powerful classical computer vision algorithms could be. CV was my first introduction to the Kalman filter, which would crop up in other courses as well. My final project for the course was on augmented reality: projecting an object into a 3D video. It was cool to see how this technology works under the hood. CV was one of my favorite classes.
Spring 2019: Machine Learning
ML is another class with high-quality lecture production. It’s a great overview of supervised learning, unsupervised learning, and reinforcement learning. The assignments are writing-heavy. I really liked that aspect of it, because by writing about the output and behavior of various ML algorithms, it helped me develop intuition about how these tools worked. I had previously taken Andrew Ng’s Machine Learning course, and so I felt well prepared for this class.
Fall 2019: Artificial Intelligence for Robotics
The lectures for this course are taught by Sebastian Thrun, the founder of Google’s self-driving car team. Dr. Thrun held office hours for the course as well, which was cool. The material covers basic robotics algorithms, with a focus on robotic vehicles: Kalman and particle filters, search algorithms like A*, PID controllers, and SLAM. The assignments for this course were fun because you get to drive a little robotic actor through scenes. After this class is when I started becoming anxious to wrap up the program.
Spring 2020: Simulation and Bayesian Statistics
Spring 2020 was the only term where I took two courses simultaneously. I imagined they would have some overlapping ideas, since they were both stats classes, and neither seemed especially hard. I managed to get an A in both courses, but it was definitely a lot of effort to coordinate the workloads and fit them into my schedule.
Simulation and Modeling for Engineering and Science was an interesting course. It was all about simulation systems: hand simulations, monte-carlo, the Arena simulation language, random variate generation, and input and output analysis. The lectures were entertaining, and there was a lot of material. This course was a little harder than I expected, probably because I didn’t have a strong stats background.
Bayesian Statistics had some overlapping ideas about probability distributions and monte-carlo methods. It was a deep-dive on Bayes Theorem and Bayesian analysis. The material covered Bayes formula, Bayesian networks, OpenBUGS, Bayesian inference, Bayesian computation, MCMC methodology, and more. This course helped me think in Bayesian terms, which is sometimes counter intuitive.
Fall 2020: Data and Visual Analytics
DVA is a broad introduction to data visualization. This was the first course I took where there was a group project. The course touched on data collection, data cleaning, SQLite, data integration, data analytics, Hadoop, Spark, D3, classification, and ensemble methods. I wasn’t crazy about this course. There didn’t seem to be any cohesion between the various ideas, and there was just a superficial coverage of the topics. I did learn how to use D3, though, which was useful.
Spring 2021: Deep Learning
This course was quite interesting. Most of the hype-generating news in the Machine Learning world is related to Deep Learning, so it was fascinating to learn how these powerful models actually work. The course covered neural networks and gradient descent, optimization of deep networks, convolutional neural nets, pooling layers, PyTorch, bias and fairness, language models, embeddings, transformers, attention, and generative models. This was another one of my favorite classes.
Fall 2021: Graduate Algorithms
GA has earned a reputation of being difficult, and it is a core requirement. As many students do, I took this as my final course. It was challenging, but I put in plenty of effort and had no issues. It covers dynamic programming, graph algorithms, and NP-completeness all in depth. The material is well organized. The grading is heavily based on three exams spaced throughout the course, but the homeworks do a good job of preparing one for them. It felt rewarding to complete this class, and I was glad to brush up on concepts I hadn’t studied since undergrad.
-
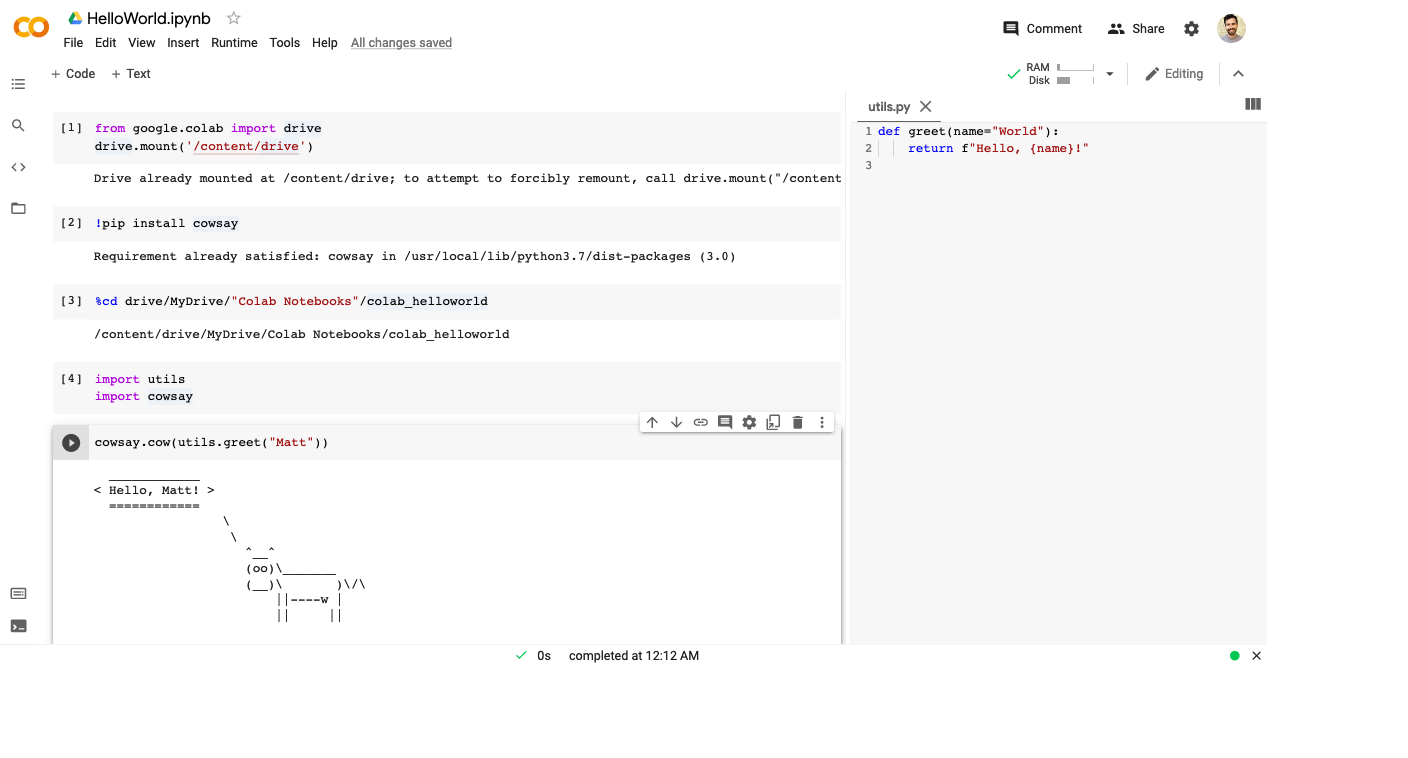
Running an existing project on Google Colab
In the Deep Learning course I’m taking, I was describing how to run one of our projects on Google Colaboratory, when another student mentioned they’d been using Colab for over a year and didn’t know some of this information. I’m sharing it here in a short post to help others get up and running quickly and effectively with Colab.
Scenario: You have an existing IPython / Jupyter notebook with a directory of additional modules, and you’d like to run the project on Google Colaboratory (Colab).
Here’s how to do it.
- Upload project directory to Google Drive
- Navigate to notebook file, right-click and select “Open with” > “Google Colaboratory” to open the notebook
- If it’s your first time using Colab, you may need to search for it in the Google Workspace Marketplace
- If you want to use a hardware accelerator like GPU or TPU, go to “Edit” > “Notebook settings” and change the device
- Open the “Files” pane via the left-hand nav bar
- From there, select “Mount Drive” to connect to Google Drive. Follow the instructions and go through the auth flow.
- Install any additional packages you need by executing
!pip install <the requirements>- Code cells beginning with an exclamation point will be executed as shell commands, e.g.
!ls
- Code cells beginning with an exclamation point will be executed as shell commands, e.g.
- Use the IPython magic command
%cdto change the working directory to your project’s directory, e.g.%cd drive/MyDrive/path/to/project- This will make it so the notebook uses the correct working direcotry when loading imports from other files and directories in your project
- You should now be able to load modules and run the rest of your notebook cells
- If you need to make changes to source files outside the notebook, you can (a) change them locally and re-upload them to drive or (b) open the files via the Colab Files section, and edit/save them directly. When edited outside of Colab, as in (a), you will need to restart the runtime or use
importlib.reload. I’ve read that the%autoreloadmagic can work here, too, but I haven’t tried it.
- If you need to make changes to source files outside the notebook, you can (a) change them locally and re-upload them to drive or (b) open the files via the Colab Files section, and edit/save them directly. When edited outside of Colab, as in (a), you will need to restart the runtime or use
-
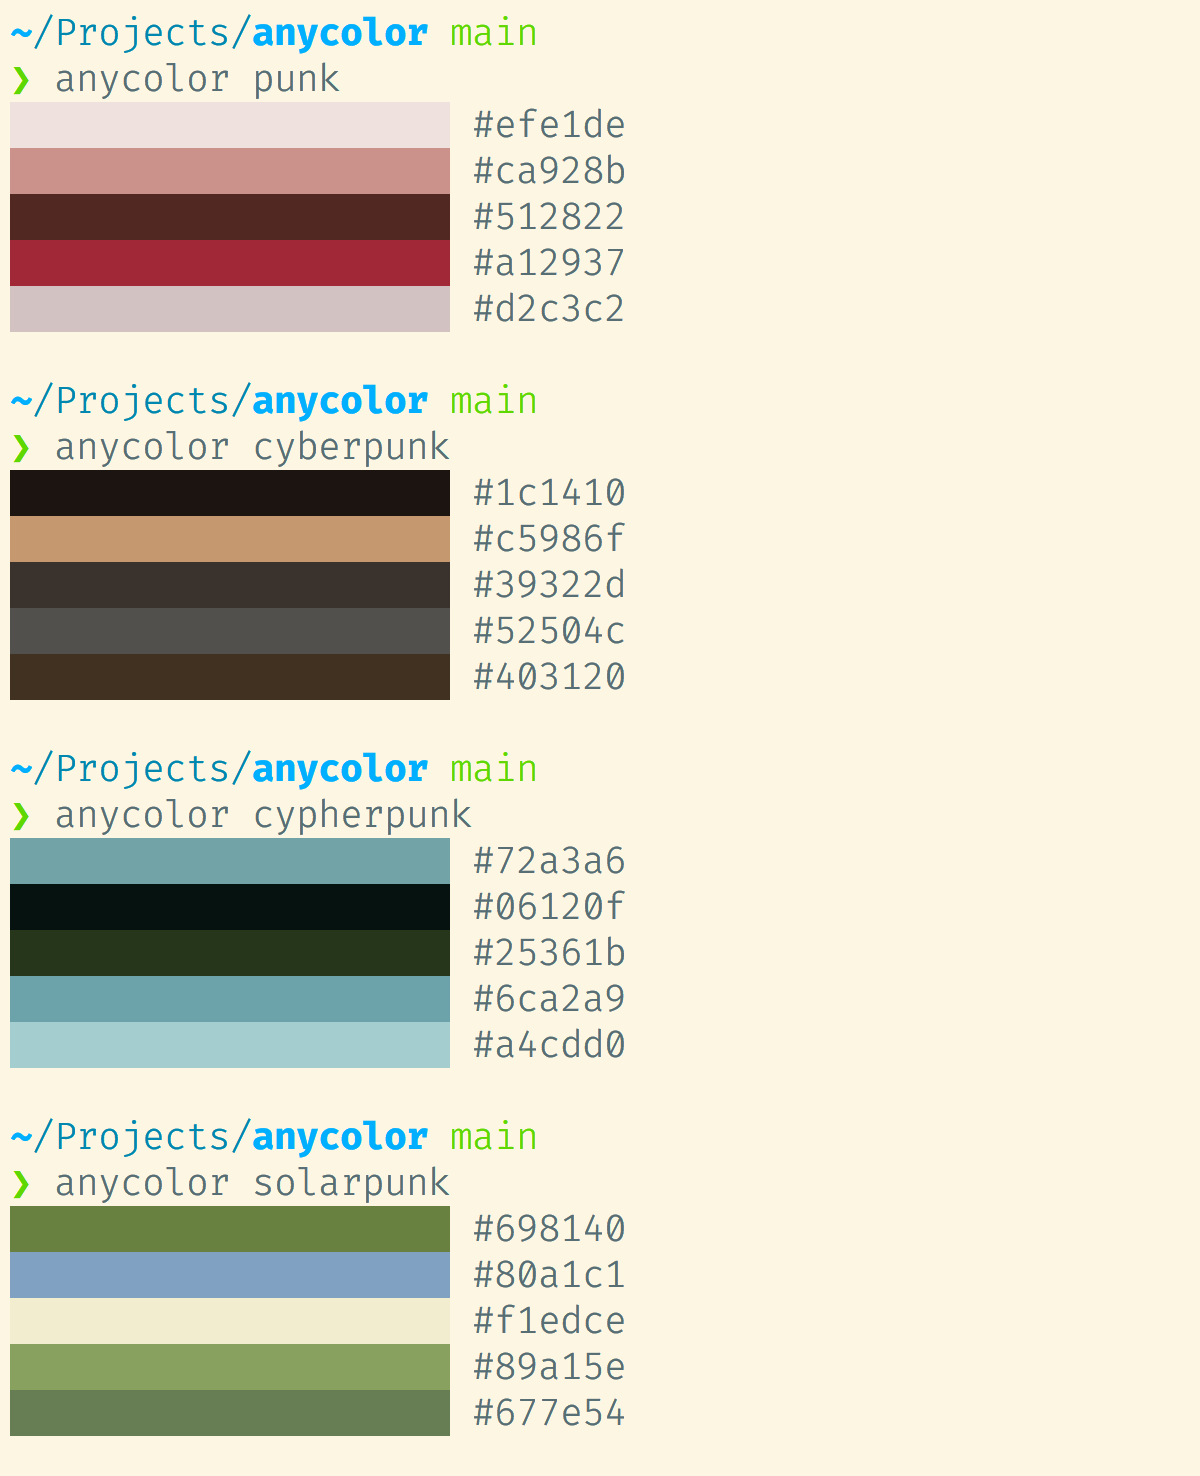
anycolor: a terminal-based search engine for color
I wrote this little toy application called anycolor, which lets you find the color of anything :)